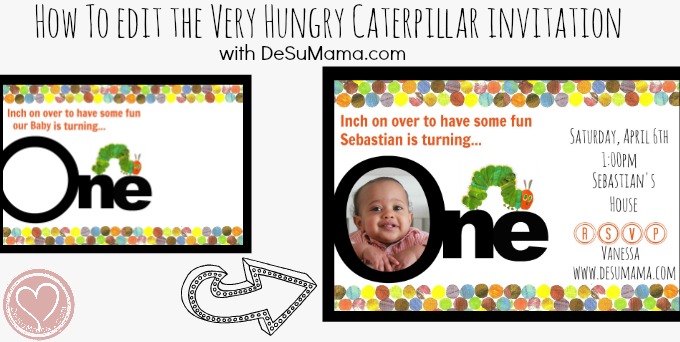
I get so many emails and questions about how to edit my Very Hungry Caterpillar party invitation free printable that I posted for our son’s first birthday. So many, in fact, that I decided to just do this quick post on how to use PicMonkey (have you heard of this site? It’s a no-download, super easy to use editing software that I, and so many other bloggers, can’t live without!) to create your own party invitation.
Check out our Very Hungry Caterpillar party posts (the second part is here) and the free printable for the Thank You cards (and VHC photo shoot) are here too. The picture we’re using for this editing tutorial is from Sebastian’s 2nd Disney Planes birthday. Crazy how much he’s grown in a year, right?
Anyway… here we go…
How to edit Very Hungry Caterpillar Party Invite:
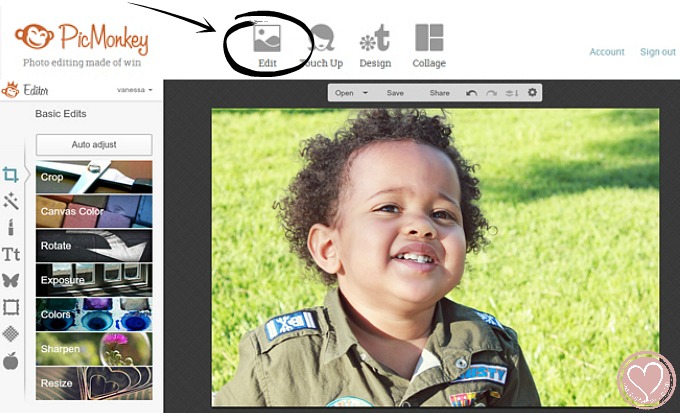
1. Open your image using the EDITING selection. Go to picmonkey.com and, using the EDIT selection at the top, open the picture you want to use in your invitation. You won’t need to set up an account, although you might get as addicted as I am, so you might as well…
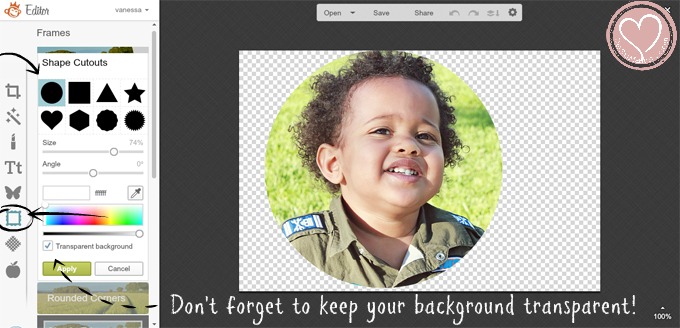
2. Select the FRAMES tool – the 6th selection down, shown as a frame – and use the first tool, Shape Cutouts. In our case, we’re using a circle, so choose that. Move the circle to fit over your baby’s portrait. You can resize the shape by using the slider. IMPORTANT note: The Transparent background tab is automatically selected. Keep it that way! The background of grey/white grid will not be visible when you open your file again. The grid is just a way for you to see what is transparent. Save the file to your desktop.
*PicMonkey recently added the Shape Cutout tool and it’s so awesome! At the time that I made this invite, I had to go through a much longer process to get a circle cutout. I can’t wait to play with all the other shapes!
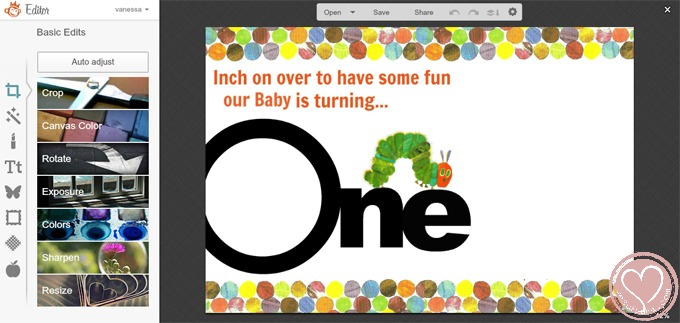
3. Open the Free Very Hungry Caterpillar Party Invitation Template using the Editing selection. At this point you can make sure the invitation is sized the way you want it. You can also use PicMonkey to add your party details. For our VHC party invitation, I used PicMonkey’s fonts called AMATIC SMALL CAPS and BACKSPACER.
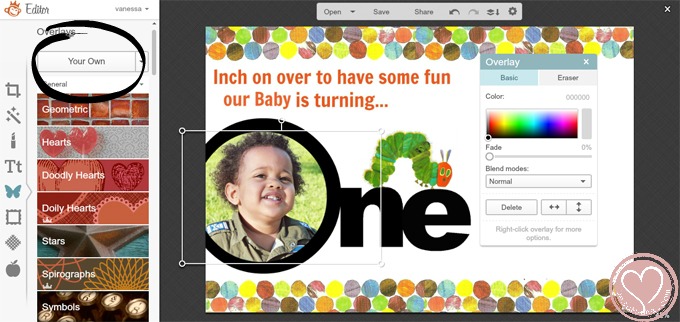
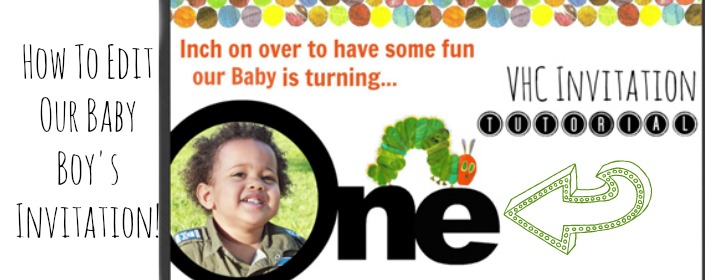
4. Upload Custom Photo Overlay onto your VHC invitation and place within the negative space of the O. After you’ve open your invitation file, choose the OVERLAY tool (the 5th tool down). You will be uploading your own overlay, so choose the YOUR OWN box at the top. When prompted, choose the circle portrait file you created in the earlier steps. Position the overlay where you want it. Use the corners of the overlay to resize it as needed.
And there you have it! PicMonkey makes it really easy to create and edit our own invitations, with our imagination being the only restriction.
I hope you enjoy our Very Hungry Caterpillar Party invitation! You can also check out our VHC Thank You cards that were cute on the goodie bags. It’s hard to believe that this same baby boy will be three soon! He’s inching along nicely 🙂
As always, shoot me a message with any questions! If you’re having trouble downloading the invitation file, please email me using the contact form above as it’s easiest (and quickest!) for me to just forward you the file from there.
All the best,
Vanessa




18 Comments
Very Hungry Caterpillar Party Invitations: Free Printable - De Su Mama
July 13, 2014 at 10:29 am[…] 7/2014: After lots of emails, I finally did a quick tutorial on how to edit this Very Hungry Caterpillar party invitation. See bottom of the post for more […]
Stephanie
July 24, 2014 at 11:06 amThanks so much for this adorable invite! I have figured out how to add all my party details…however is there a way to change ‘our baby’ to our daughter’s name?
Vanessa
July 28, 2014 at 10:14 amHi Stephanie, Have you seen this editing tutorial I posted recently? Try using a white shape overlay to “erase” my wording, then just add your own! Hope that helps!
http://www.desumama.com/very-hungry-caterpillar-party-invitation-editing-tutorial/
Denise Feliz
August 8, 2014 at 12:02 pmGracias por compartir esta invitacion y como hacerla!!!! I loved it and am using it for my baby’s first birthday.
Thank you soooooooo much!
Vanessa
August 9, 2014 at 12:23 pmThe picture of your little one that you sent me was SO absolutely adorable! Thank you for brightening me day <3
Kelly
September 4, 2014 at 1:49 pmHow do I download a copy of this invitation to modifty and use it! It is so sute, butI’ve tried clickling everylink on your website on both a Mac and a PC and have had no luck. I typically computer savvy but for some reason not with this.
Vanessa
September 8, 2014 at 11:12 amEmail me via the form on the Contact Me page!
Trish
September 12, 2014 at 6:36 amThanks heaps for the free invite. It worked a treat.
martha perez
September 17, 2014 at 10:49 amhello there…. how do you edit the word baby and how do i put in the boys name? thank you 🙂
Amy
October 22, 2014 at 2:45 pmThanks for the free invite! It worked perfectly and looked absolutely adorable…and I discovered pic monkey which is awesome! How did I not know about that website?!? Thanks again!
Martha
October 28, 2014 at 2:13 amHi
i was just wondering how do you change “our baby” to my sons name, ive tired everything but for some reason i cant figure it out.
Vanessa
October 28, 2014 at 4:31 pmHi Martha, try using the program I mention in the post. Add a white rectangle overlay on top of the words you want to change. This will effectively act as an “eraser”. Then add your wording on top. Hope that helps!
Kristy
March 24, 2015 at 1:47 pmI am having trouble sizing the invite so that I can print it out. How did you go about doing this? Thank you for all of your help!!
Vanessa Bell
March 27, 2015 at 1:34 pmDid you check out the tutorial post I have linked here? You should be able to resize the invite with PicMonkey, Photoshop or any photo software. Hope that helps!
elaine
July 2, 2016 at 4:30 pmHi there! I love the invite and created a lovely one! But I can’t figure out how to print it out and even though I clicked save, I’ve no idea where it is! I don’t want to create an account.
Ren
August 7, 2016 at 8:14 amVanessa
THANK YOU
i am planning my daughters first birthday and this was amazing
You are wonderful to share and to have such fantastic steps to follow
thank you so very much
Ema
September 11, 2017 at 3:25 amHello Vanessa,
I just stumbled upon this birthday invite you created for your son’s birthday as I was looking for one for my son’s party. One quick question. How did you change the template to show your son’s name? I have edited everything else, but can’t seem be able to edit the “our baby is turning” part. Thanks!
Vanessa Bell
October 26, 2017 at 12:07 pmI used pic monkey to edit the invite!