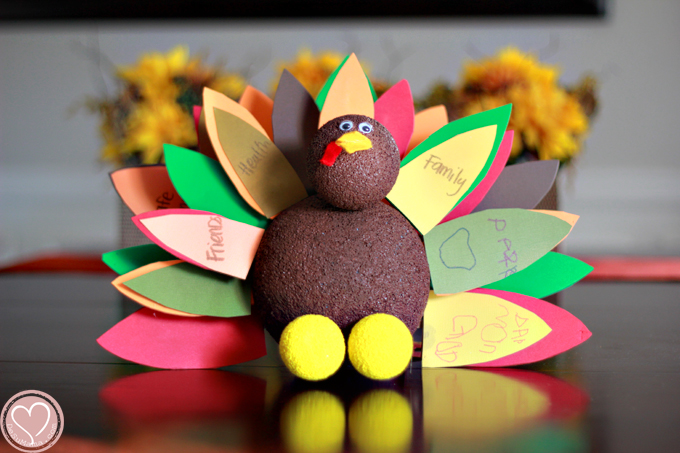
I’d like to introduce you to Mr. Grateful Turkey, the daily gratitude craft that Alina and I made together. For so many reasons, I have relished opportunities to “get zen” and feel lucky lately. This gratitude turkey craft does just that! It’s easy to feel overwhelmed with life and forget your blessings. This Thanksgiving craft on gratitude, much like our Toddler Advent Calendar last year, is meant to exhibit the power of gratitude while also reminding me to practice what I preach.
Gratitude Turkey Craft
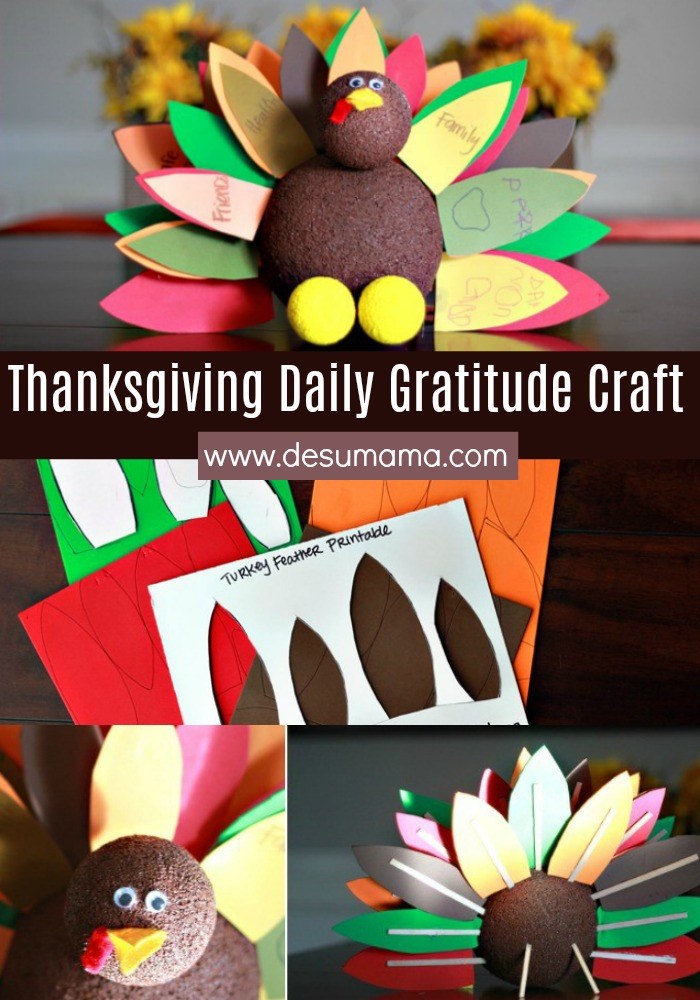
Thanksgiving Daily Gratitude Craft Tutorial
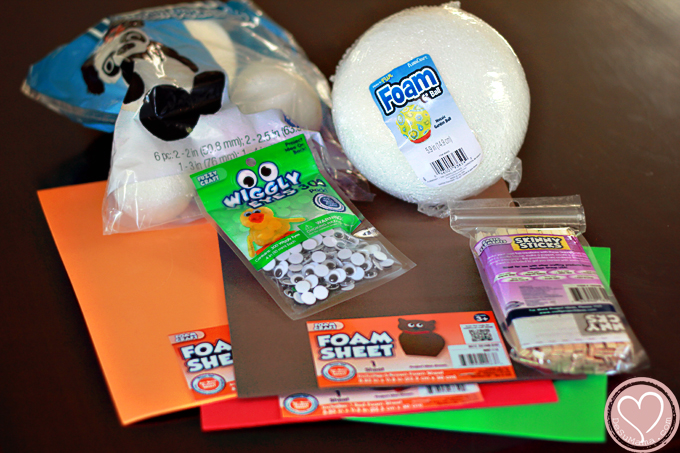
We used a combination of store bought supplies and stuff we had at home. We purchased a styrofoam ball for the turkey’s body, head and two small ones for his feet. We bought a package of wiggly eyes, some sticks and a few sheets of foam for the first layer of feathers (more on that below).
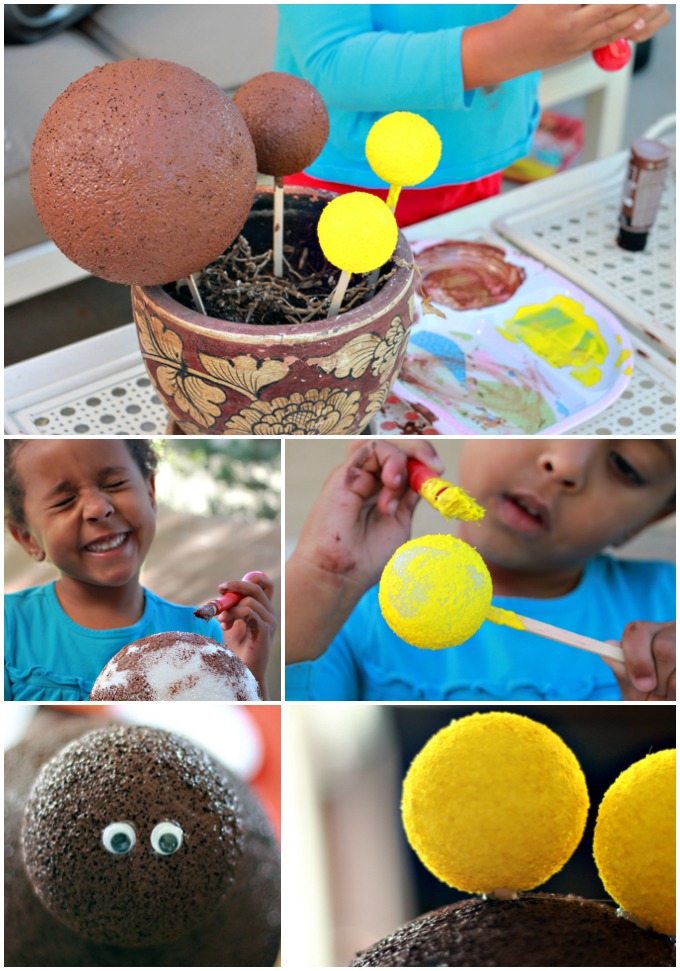
To get started, first paint the styrofoam balls – brown for the two big ones, yellow for the smaller balls. Pierce with sticks to hold the ball and paint it from all angles. Stick it in a dead potted plant to dry (doesn’t everyone have dead plants laying around?). Wait a few hours until completely dry. You’ll be handling the balls a lot, so give them plenty of time. I let them dry overnight.
My little girl just loved to paint the balls of the turkey’s body. We took our time, sang songs and talked about what it meant to be grateful. I also explained to her my belief that when you are focused on being grateful, you’re too busy to feel sad or upset.
For a tiny little girl who doesn’t know much hardship in life, this was kind of over her head, but simply explaining the sentiment was cathartic for me. I’m not the best at being grateful, but I am focusing on it more and more.
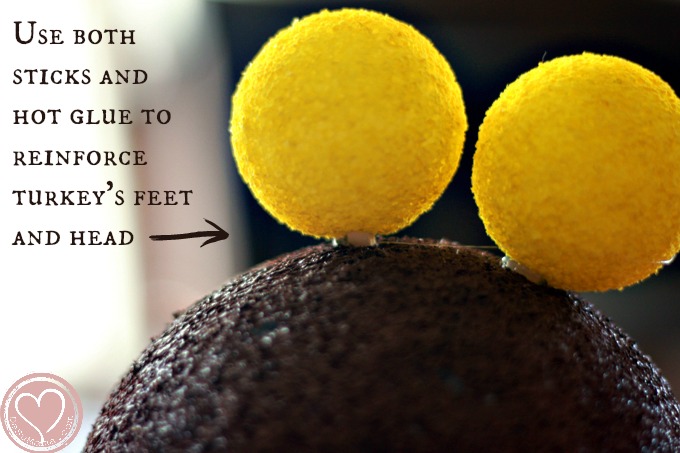
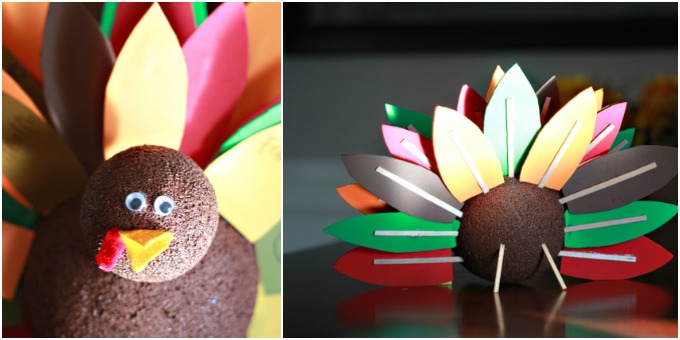
Anyway, to assemble the turkey’s body, break the wooden sticks down to a reasonable length and cover the tips with hot glue (for added reinforcement). Stick the sticks into the styrofoam balls – towards the top of the head, in front and next to each other for the feet. Using the hot glue gun, add the turkey’s little eyes. Put the body aside while you work on the feathers.
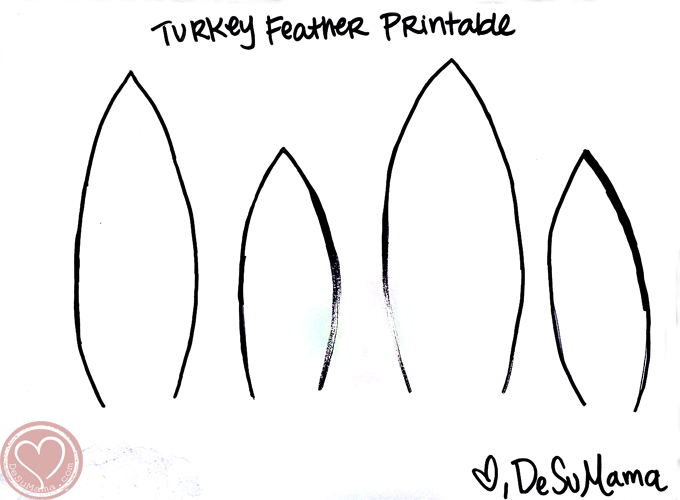
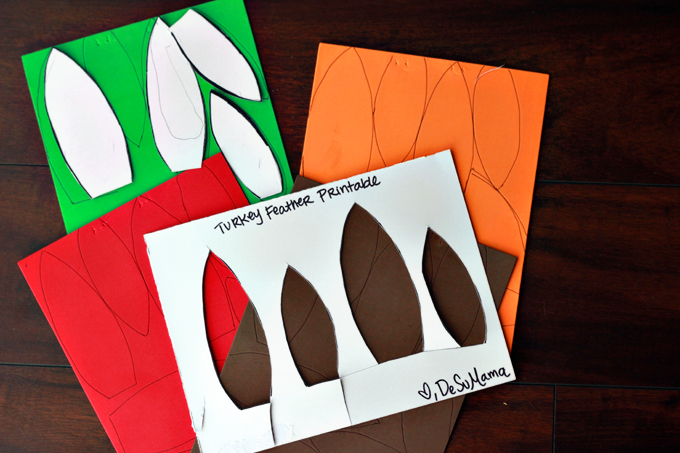
I handmade a stencil for the feathers. I looked for the type of printable I wanted, and nothing was quite right, so I drew one up. It’s nothing amazing, but you’re welcome to it if you’d like. See below for the free turkey feather printable. There are two large feathers and two smaller feathers, with varying thickness, so to allow for an organic and natural look to our turkey’s feathers. Cut them out onto a thick card-stock or cardboard, so that the stencil will hold up for a while.
For the feathers, I decided to make two layers: 1 using foam and 1 using paper. While this might be a great practice of patience and delayed gratification for older kids (adding 1 feather each day in November to eventually display a turkey full of feathers), my daughter is not even 4 years old and we’re just now introducing the elements of Thanksgiving to her. She was so happy to see the entire turkey come together and has been motivated to talk about gratitude ever since, so I think I made the right call.
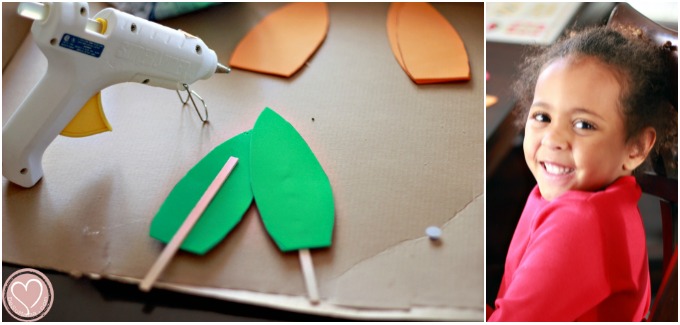
The first layer of feathers is cut out of foam sheets of various colors and hot glued to sticks. I did not hot glue the foam feather sticks into the turkey’s body so that storing our craft for next year’s daily gratitude project would be easy. I arranged them in rows, switching the sizes and slightly staggering them. I trimmed the feather’s length as needed. I suggest making sure the lowest feathers on the sides of the turkey body are the biggest and touch the surface where your turkey will be sitting – this will help stabilize the craft. Other than that, just stagger the rows and have fun. Do whatever feels right for your turkey.
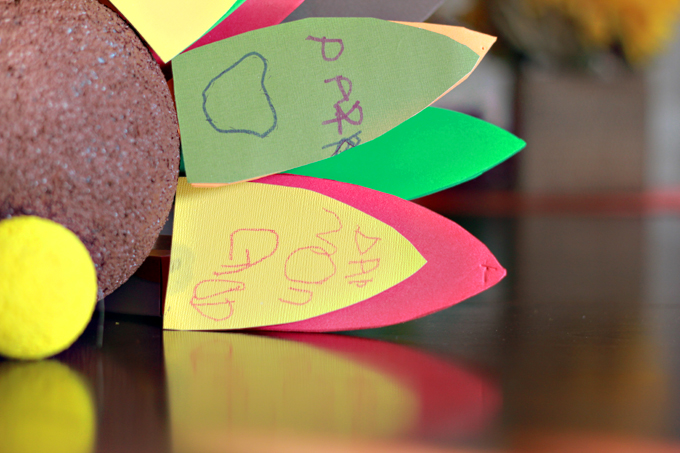
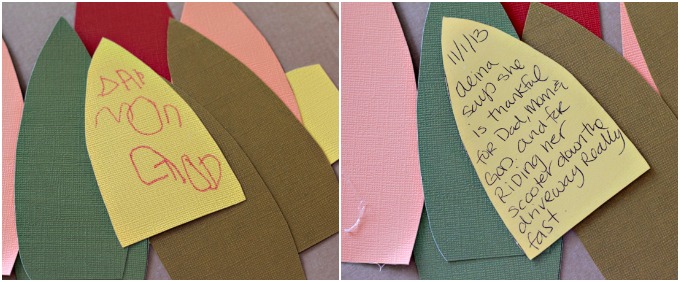
I then used the turkey feather stencil to make another layer of feathers with regular colored paper. I set these aside so that each day Alina and I can write what she is grateful for. I adhere the paper feathers onto the foam feathers using adhesive dots. On November 1st, she was grateful for Dad, Mom, God. I did not prompt her to write this, but it really made my heart happy! These words also happen to be the only ones she knows how to write on her own (other than her name)! Ha!
On the reserve side of the paper feather, I made a note of what she said, which on November 1st (in addition to Dad, Mom, God) included riding her scooter down our driveway really fast. I believe she meant that she’s grateful for being brave, but I transcribed what she said literally – each year, I’ll remove these paper feathers and keep them so that we can appreciate her growth and maturity. And her legacy of gratitude.
On the 2nd day of November, Alina was grateful for the park. We went out as a family to the farmer’s market where she got her face painted and played with a friend. I’m not pushing her to be grateful for anything in particular or even using this project to reinforce our family values. I really just want to use the words of gratitude, grace, and thanks in our parenting deliberately – I want to employ the power of gratitude to raise happy kids.
To finish off the craft, I added the turkey’s beak and gobble thing using yellow and red felt and hot glue. For the beak, I cut out a diamond shape and folded over. For the snood, I just free handed it. Easy peasy. I also added some sticks in the back to balance the gratitude craft out.
If you decide to make this or made your own gratitude crafts for kids, please do let me know. I am excited to see what this silly girl comes up with each day and would love to hear what yours are talking about! Alina has grown so much over the last few months, and I know this holiday season is going to be our best one yet.


Gratitude In Parenting Is Not All About Being Grateful - De Su Mama
November 5, 2013 at 4:21 pm[…] with this cute Thanksgiving craft that prompts us to think about gratitude often during the month of November, I also started a […]
Jody
November 7, 2013 at 6:27 amI love this craft Vanessa – especially that you will be able to reuse it and save Alina’s word and thoughts throughout the years – fabulous! I’m pinning this!
Honoring Our Favorite Veteran #WallofHonor - De Su Mama
November 8, 2013 at 5:25 pm[…] As a participant in the Walmart nofollowMoms Program, I’ve received product samples and compensation for my time and efforts in creating […]
14 Ways to Show Kids Gratitude this Thanksgiving – Bright Ideas
November 11, 2013 at 3:45 am[…] this spin on a gratitude turkey from De Su Mama. Perfect for little hands to add leaves of […]
The First Thanksgiving: Who Are The Wampanaog? - De Su Mama
November 15, 2013 at 5:44 pm[…] been talking about gratitude all month (check out the turkey Thanksgiving Craft that Alina and I made!), but I wanted to do something that imparted the legacy of the Wampanaogs. I […]
DIY Multi Holiday Table Runner | Frugal Upstate
November 18, 2013 at 10:13 pm[…] what some of the other Walmart Moms made? De Su Mama made a Thanksgiving Turkey gratitude craft, MomAdvice made a Knitted Leaf Centerpiece, Cutie Booty Cakes made a Kids Hand Thanksgiving Turkey, […]
Top 10 DIY Thanksgiving Gratitude Crafts - Top Inspired
November 25, 2013 at 2:29 pm[…] DIY project and photo credit to desumama.com […]
Jaseena AL
December 2, 2013 at 10:17 pmI love all your craft tutorials i must say you are creative 🙂
Chinese New Year Drum Craft for Kids - De Su Mama
January 31, 2014 at 3:29 pm[…] this drum craft at Walmart in their craft section…. along with the leftover supplies from our Turkey gratitude craft, I probably spent a total of […]
Giving thanks craft | homedesignmagz.com
November 14, 2014 at 3:22 am[…] (source) […]
Making Snow Dough for Winter Time Fun - De Su Mama
January 6, 2016 at 1:12 am[…] version of Olaf… happy Olaf, 3-eyed sad Olaf, squished Olaf. We used the craft eyes from our Thanksgiving Turkey gratitude craft and twigs from outside. Sebas was in “ooooman” heaven as he mushed his little fingers […]
Early Childhood Turkey Unit Study - Prodigies Music Lessons for Kids 1-12
November 18, 2018 at 3:26 pm[…] to your students! Head over to De Su Mama for step-by-step instructions on how to create Mr. Grateful Turkey! You can also tweak it just a bit for a Prodigies activity. Instead of students writing what they […]